
Creating Upsell Offers (End-to-End Setup)
Purpose
Answer: “How do I build a working upsell from start to finish?”
Why This Matters
Most upsells fail not because of the product, but because of poor setup:
- Too many products shown at once
- Timers conflicting with the edit window
- Weak or confusing CTAs
- Offers active but invisible due to missing blocks
This guide walks you through one complete upsell journey, built correctly the first time.
How Upsell Offers Work in Account Editor
One upsell offer = one customer journey
Each offer is modular and controlled by:
- Products shown
- Incentives (optional)
- Timing and urgency
- CTA confirmation
When accepted:
- The item is added to the same Shopify order
- Shopify recalculates totals automatically
- The action is logged in the order timeline
No new checkout. No duplicate orders.
Step-by-Step: Creating a Complete Upsell Offer
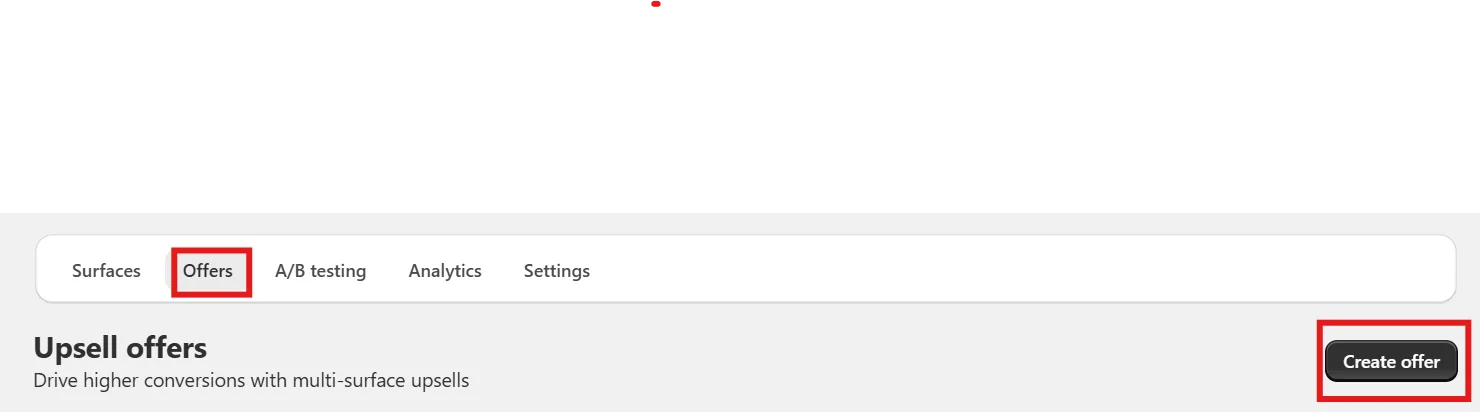
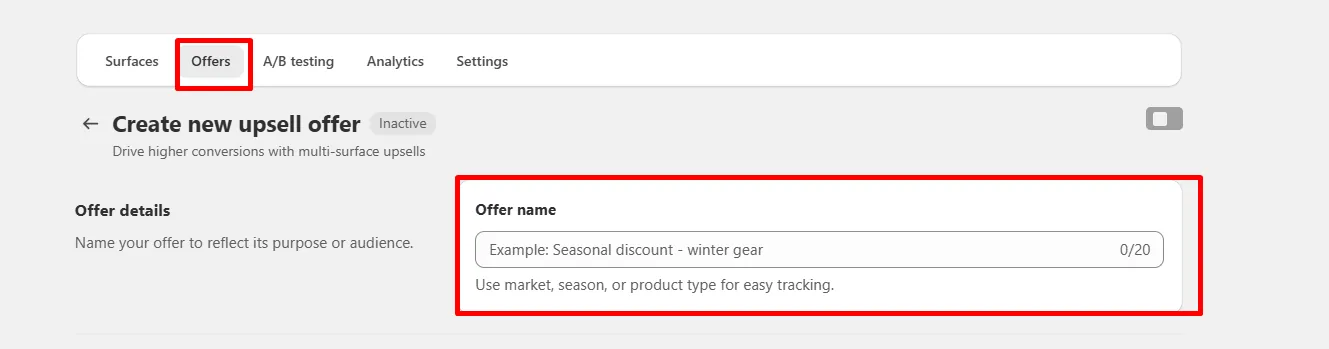
Step 1: Offer Details — Name Your Offer
This name is internal only (customers never see it). Best practices:
- Keep under 20 characters
- Include surface or intent
- Stay consistent across campaigns
Examples:
Checkout – Add ChargerThankYou – Bundle 10%OrderStatus – Cross-Sell
Step 2: Product Modules — Choose What Customers See
Product Modules define what appears inside the upsell widget.
You can add one or multiple, but simplicity converts best.
Available Modules
Single Product
- One focused recommendation
- Best for accessories or upgrades
Group Products
- Small curated set or bundle
- Best for “Complete the set” offers
Recent Product
- Auto-suggests items the customer interacted with
- Works well on Order Status page
Abandoned Checkouts
- Shows items previously left behind
- Strong recovery use case
Step 3: Urgency Timer (Optional but Powerful)
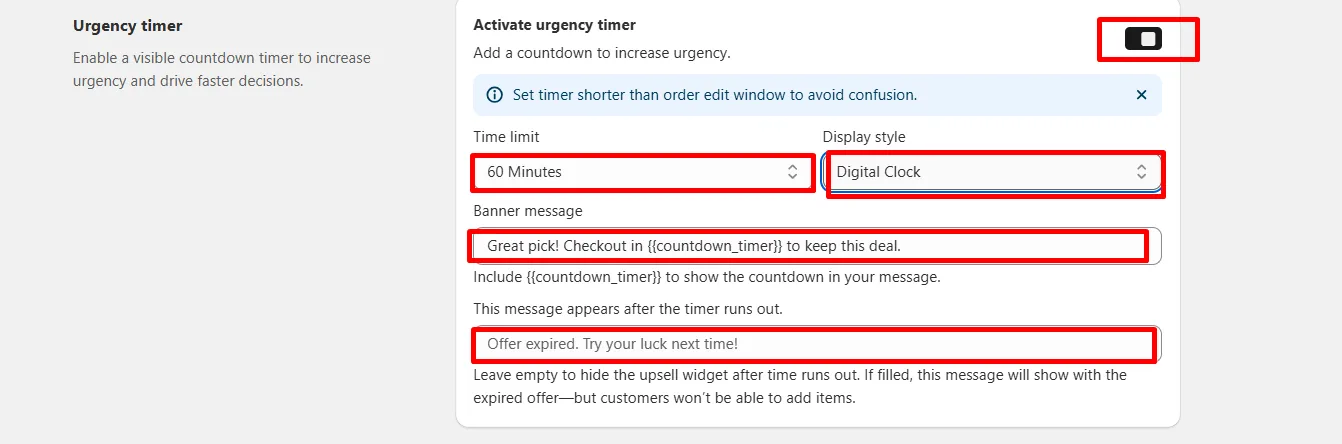
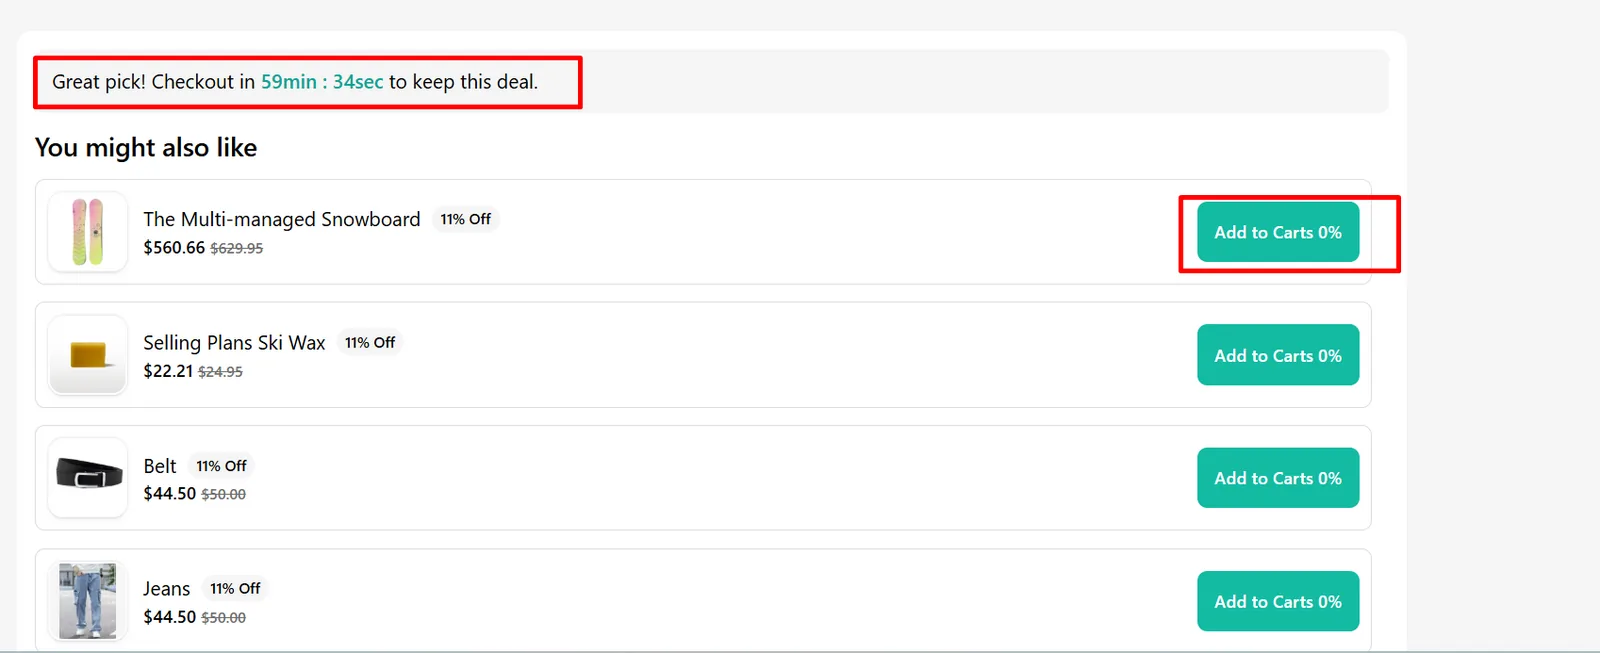
The Urgency Timer creates time-bound intent, not pressure.
What you can configure:
- Countdown duration (e.g. 10–60 minutes)
- Display style (clock or progress bar)
- Live message using
{{countdown_timer}} - Optional expiry message
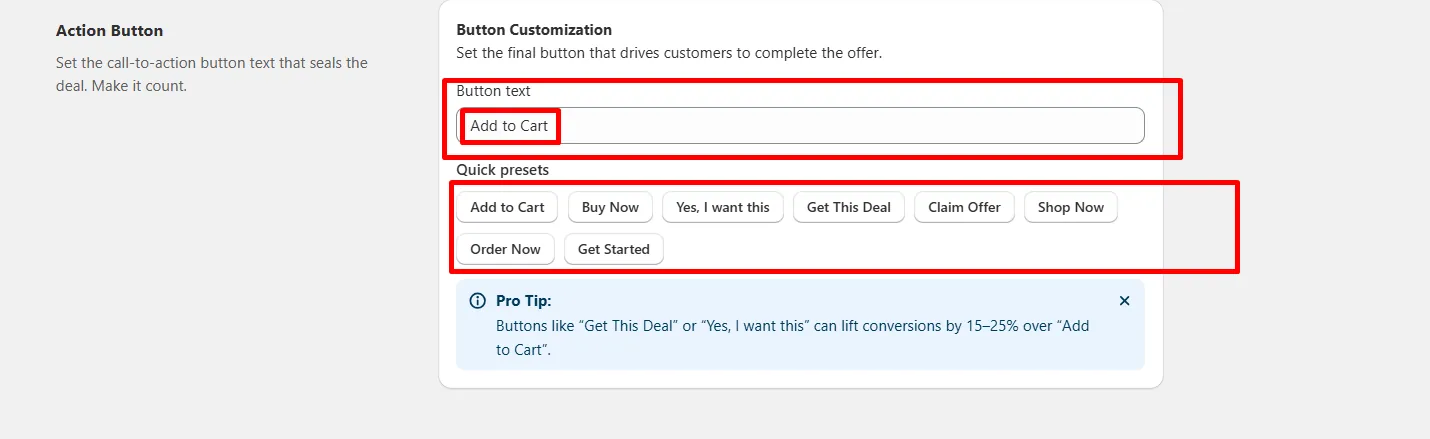
Step 4: Action Button — Confirm the Upsell
The Action Button is the conversion moment.
Best practices:
- 2–4 words
- Positive, natural language
- Matches brand tone
High-converting examples:
- “Add to My Order”
- “Yes, Add It”
- “Complete the Set”
- “Upgrade My Order”
Avoid:
- Technical labels (“Submit”)
- Aggressive copy
- ALL CAPS

Step 5: Review & Activate
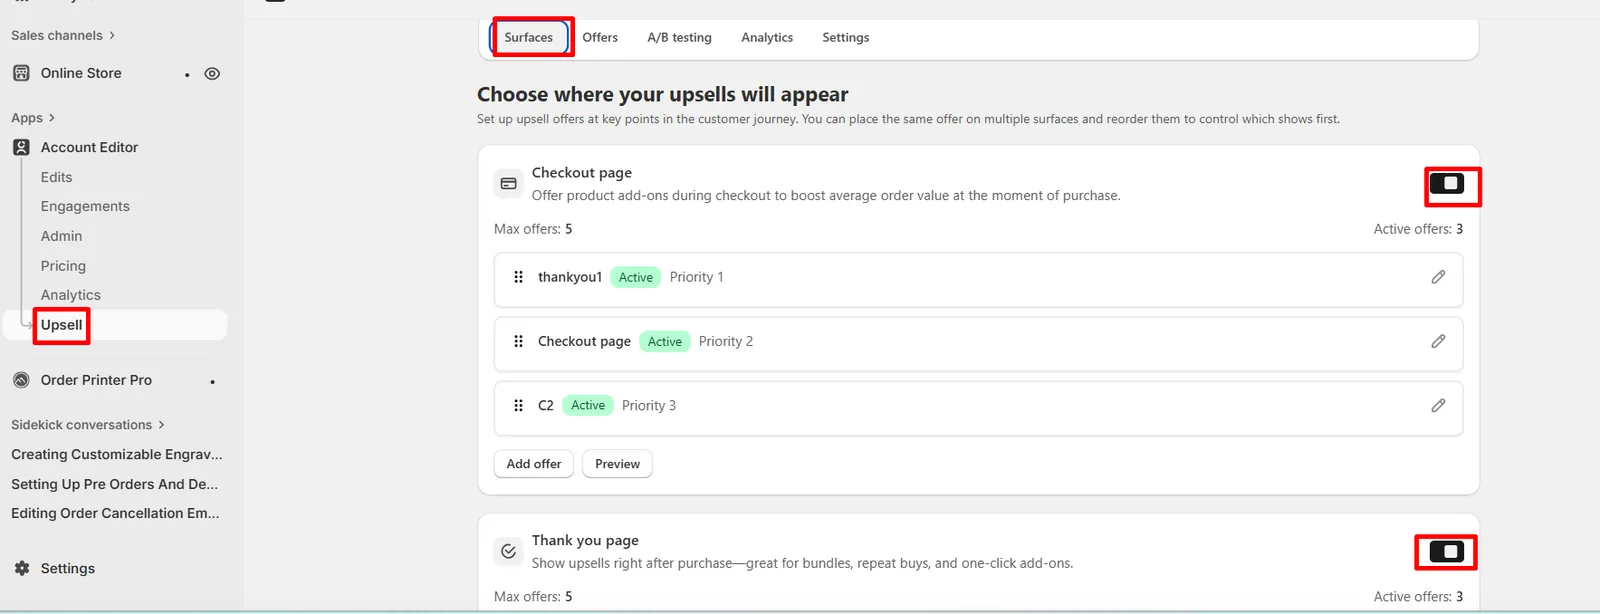
Before switching the offer live, verify:
- Offer status is Active
- At least one surface is selected
- Product Modules are ordered correctly
- Timer (if used) is valid
- CTA is visible in preview

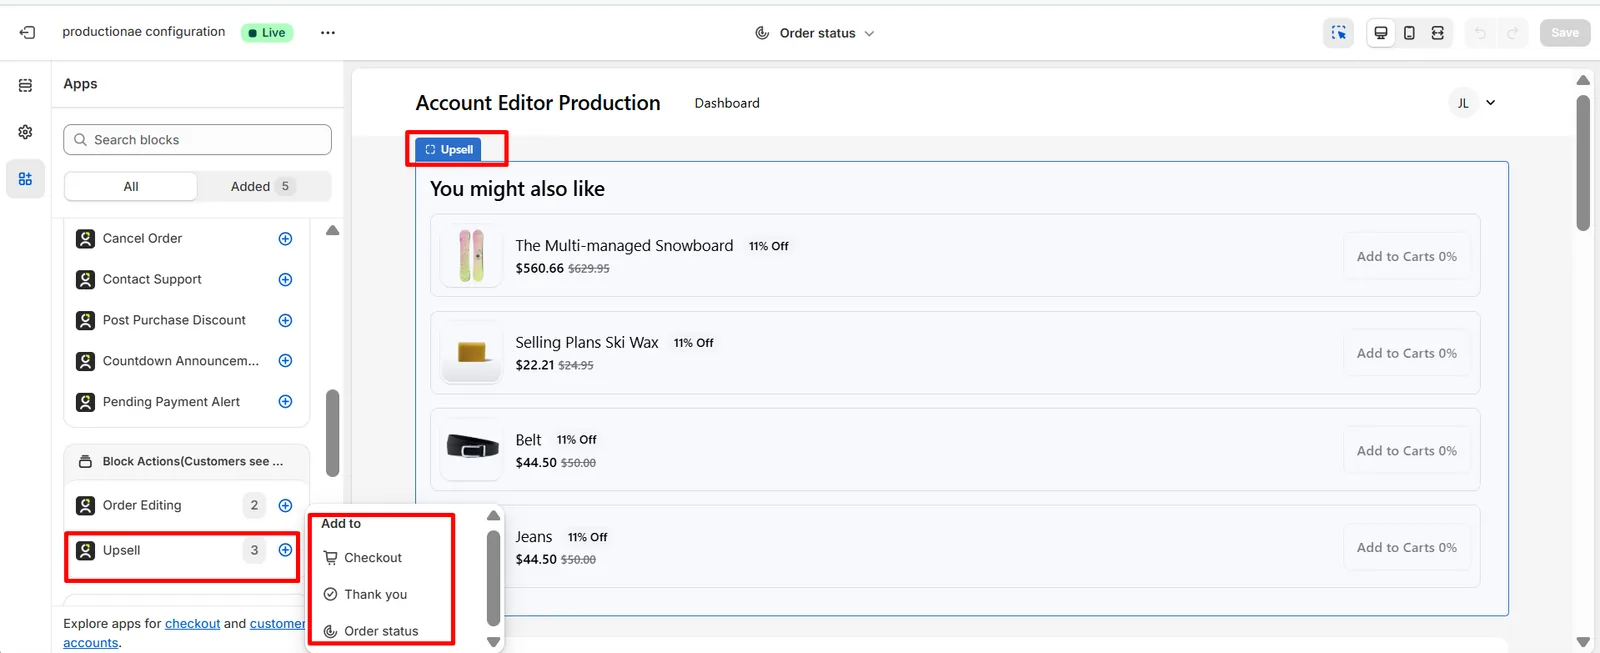
Final step (often missed):
Real Merchant Scenarios
Scenario A — “Too many products, low conversion”
Cause: Five products shown at once → decision overload. Fix: Reduce to one primary product + one backup option.
Scenario B — “Timer expired instantly”
Cause: Timer longer than edit window. Fix: Shorten timer or disable it entirely.
Scenario C — “Offer active but invisible”
Cause: Upsell Block not added to the surface. Fix: Add the Account Editor Upsell Block in the correct page template.
FAQs
Can I show multiple products in one upsell?
Yes, but limit it. Fewer options convert better.
Can upsell items be edited later?
Yes — if allowed in your targeting settings and the order remains editable.
Can I reuse the same offer on multiple surfaces?
Yes, but adjust copy and products per surface for best results.
Common Issues & Fixes
| Issue | Cause | Fix |
|---|---|---|
| Offer active but not showing | Block missing | Add Upsell Block in theme |
| CTA not visible | Button text empty | Set label and save |
| Timer disappeared | Expired | Shorten duration or disable |
| Products not loading | Module misconfigured | Re-select products |