
Microsoft Dynamics 365 Business Central
Microsoft Dynamics 365 Business Central Integration — Shopify Order Edited Sync (Account Editor)
This guide helps merchants using Dynamics 365 Business Central configure the integration so that Account Editor order edits are always reflected correctly — with no mismatched totals or stale order data sent to Business Central.
Step-by-Step Configuration
Step 1 — Enable Manual Payment Capture in Shopify
Set Shopify to hold payment in Authorized state so Business Central cannot import the order until Account Editor editing is complete and payment is captured manually.
- Log in to Shopify Admin
- Go to Settings → Payments
- Scroll down to Payment capture method
- Select "Manually" — Authorize payment at checkout and capture manually
- Click Save
Authorized state. Business Central only imports Paid orders — so the order stays invisible to BC until you capture payment after editing.Step 2 — Connect Your Shopify Store to Business Central
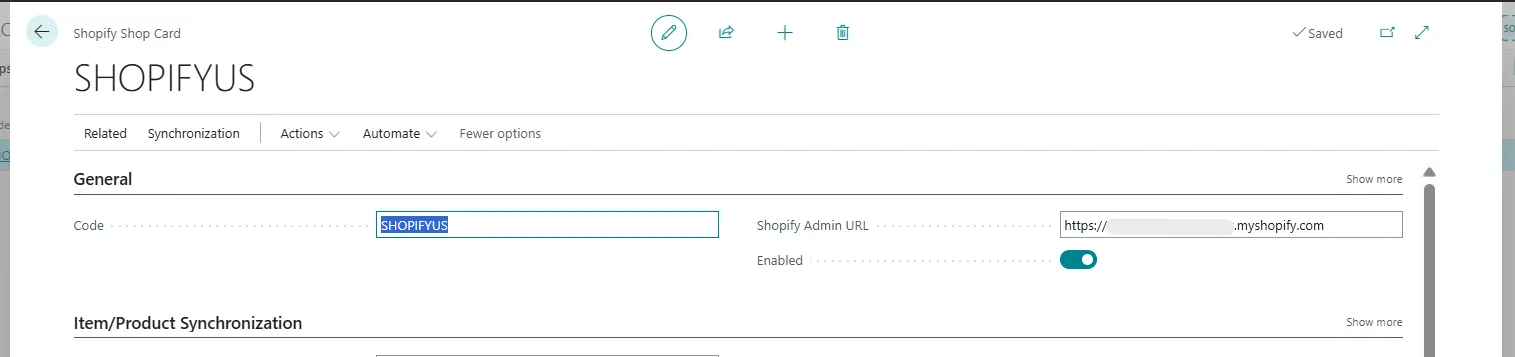
Set up the connection between your Shopify store and Business Central using the Shopify Shop Card.
- Log in to Business Central
- Press Alt + Q (Tell Me search) and type Shopify Shops → press Enter
- Click New to create a new shop connection
- In the Code field, enter a short name for your store (e.g.
SHOPIFYUS) - In the Shopify Admin URL field, enter your store URL:
myshopify URL - Turn on the Enabled toggle
- Review and accept the terms and conditions
- If prompted, sign in to your Shopify account and click Install App
Step 3 — Configure Order Synchronization Settings
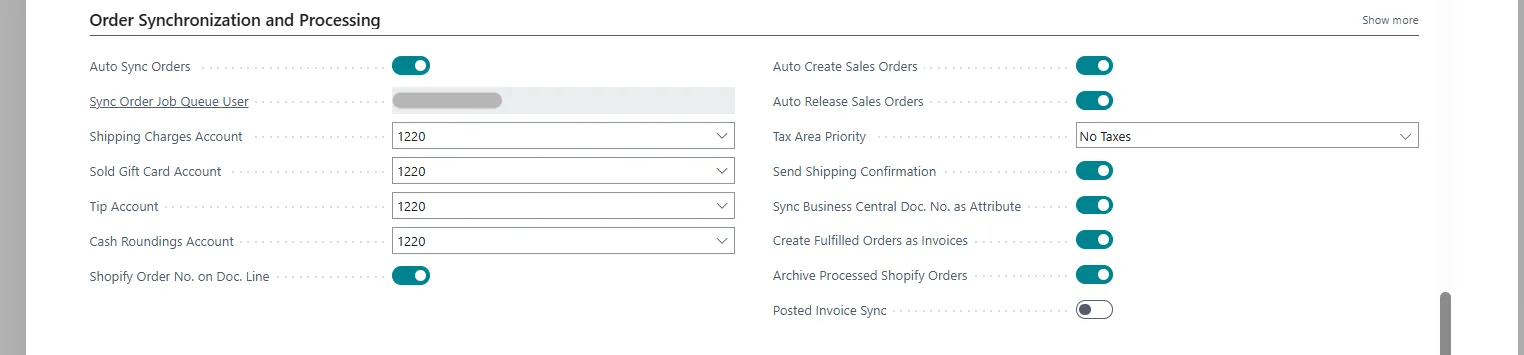
On your Shopify Shop Card, go to the Synchronization tab and scroll to the Order Synchronization and Processing section. Configure the following settings:
| Setting | Value |
|---|---|
| Auto Sync Orders | ON — enables real-time webhook-based order notifications |
| Auto Create Sales Orders | ON — automatically creates sales documents in BC when an order is imported |
| Auto Release Sales Orders | ON — automatically releases the sales order after creation |
| Create Fulfilled Orders as Invoices | ON — creates Sales Invoice for fulfilled or gift card orders |
| Archive Processed Shopify Orders | ON — archives fully paid and fulfilled orders automatically |
| Sync Business Central Doc. No. as Attribute | ON — adds BC document number to Shopify order for traceability |
Step 4 — Run Your First Manual Order Sync
After connecting and configuring your shop, manually trigger the first sync to import existing Shopify orders into Business Central.
- In Business Central, go to Shopify menu → select your shop → click Orders
- In the ribbon, click Actions → Sync Orders from Shopify
- A request page appears — leave filters blank for the first sync to import all orders
- Click OK — Business Central will import all available Shopify orders
- Refresh the Orders list — your Shopify orders will now appear
Step 5 — Set Up Automatic Paid Order Import via Job Queue
Configure a recurring Job Queue entry so Business Central automatically imports only paid orders from Shopify every 5 minutes — no manual sync needed.
Find the Job Queue Entry
- Press Alt + Q and search for Job Queue Entries → press Enter
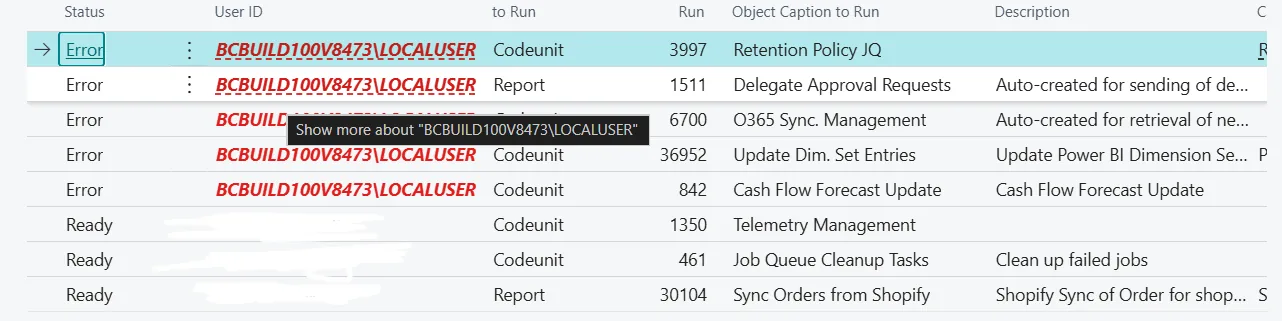
- Look for the entry with Object ID 30104 — Sync Orders from Shopify
- Click the entry to open the Job Queue Entry Card
Configure the Job Queue Entry
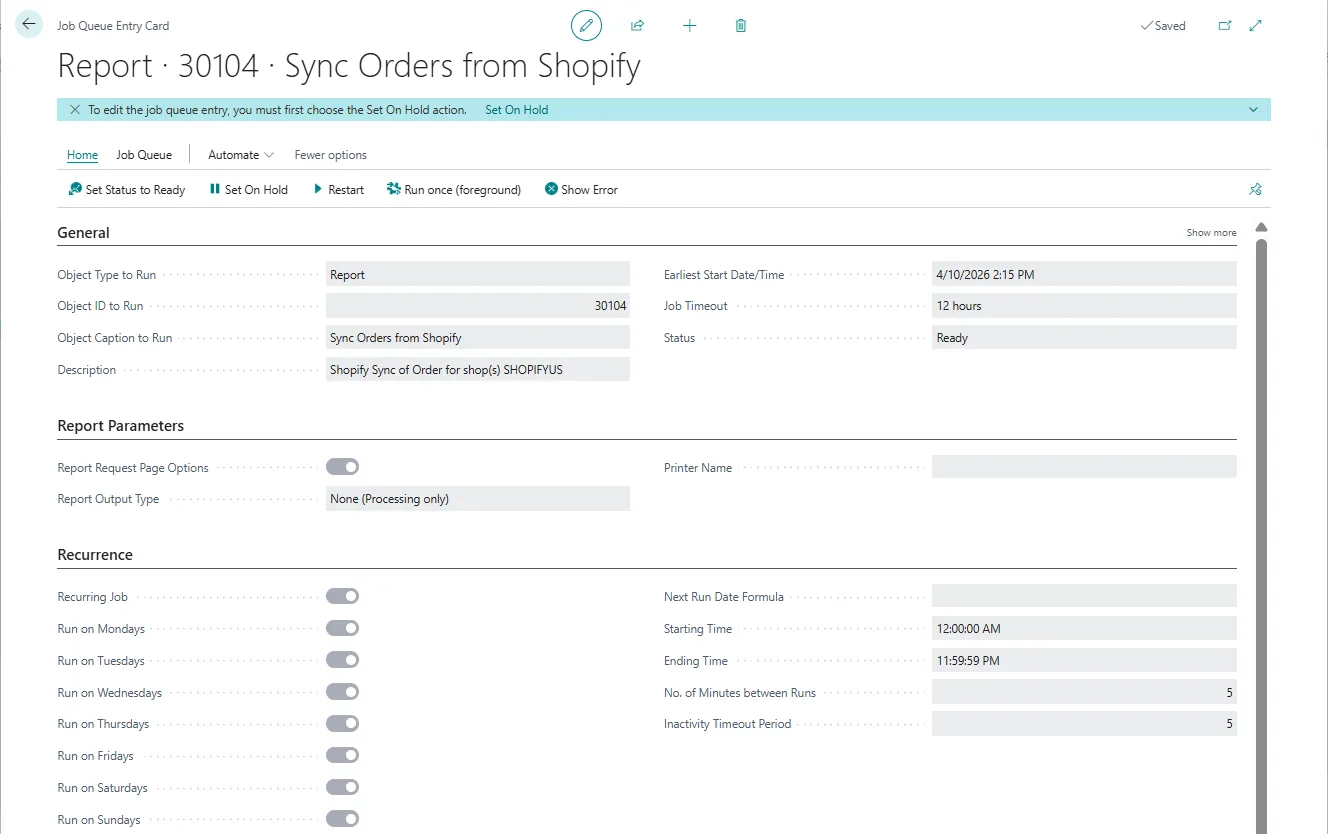
- Click Set On Hold in the top ribbon to enter edit mode
- In the Recurrence section, turn ON all days: Monday through Sunday
- Set No. of Minutes between Runs =
5 - Set Starting Time =
12:00:00 AMand Ending Time =11:59:59 PM
Set the Paid Orders Filter
- Go to Shopify menu → Shops → your shop → Actions → Sync Orders from Shopify
- On the request page that opens, set Financial Status =
paid - Click Send to Job Queue — this saves the filter directly to the Job Queue entry
Activate the Job
- Return to the Job Queue Entry Card
- Click Set Status to Ready in the top ribbon
- Status should now show Ready — the job will run every 5 minutes automatically
Automate Payment Capture with Shopify Flow
Step 6 — Import the Account Editor Delayed Master Flow
The Account Editor Delayed Master Flow is a pre-built Shopify Flow automation that holds payment capture for a configurable grace period, then captures automatically — triggering ShipBob to download the finalized order.
- Download the Account Editor Delayed Master Flow file (provided with this guide)
- In Shopify Admin, go to Apps → Shopify Flow
- Click Import and select the downloaded
.flowfile - Configure the grace period timing to match your editing deadline (e.g., 30 minutes)
- Click Activate to enable the Flow
- Click Save
Authorized to Paid. ShipBob then downloads the order with all edits included.Common Issues & Fixes
| Issue | Likely Cause | Fix |
|---|---|---|
| Orders not appearing in BC after store connection | Manual sync not triggered yet | Go to Shopify → Orders → Actions → Sync Orders from Shopify → OK |
| BC imports order before Account Editor editing is done | Payment capture not set to Manual in Shopify | Go to Shopify Admin → Settings → Payments → set capture method to Manually |
| Job Queue not running automatically | Status is On Hold or days not configured | Open Job Queue Entry 30104 → enable all days Mon–Sun → Set Status to Ready |
| All orders importing — paid filter not working | Financial Status filter not saved to Job Queue | Use Actions → Sync Orders from Shopify → set paid filter → Send to Job Queue |
| Orders list shows "There is nothing to show" | No sync has been run yet | Trigger manual sync first — then Job Queue handles subsequent imports |
| Archived Shopify orders not importing | Orders archived in Shopify before import | Shopify Admin → Orders → Unarchive the order, then sync again |
| Sales documents not created after order import | Auto Create Sales Orders toggle is OFF | Shopify Shop Card → Synchronization tab → turn ON Auto Create Sales Orders |
| Authorization expired before payment capture | 7-day Shopify Payments window missed | Capture payment within 7 days — set up Shopify Flow to automate this |
| Pop-up blocked during store connection | Browser blocking BC pop-up for Shopify token | Allow pop-ups for Business Central in browser settings and retry Enabled toggle |
Best Practices
- Always set Shopify payment capture to Manual before going live with this integration
- Use Shopify Flow to automate the editing window timeline — never rely on purely manual capture
- Edit orders in Account Editor before capturing payment for the cleanest BC import
- Set Job Queue to run every 5 minutes for near real-time paid order imports
- Always map Shopify locations to BC locations before the first sync
- Turn off Automatically archive the order in Shopify General settings to prevent import gaps
- Check the Shopify Orders to Import page in BC to diagnose import errors — the Has Error field shows failures
- Use the
processed_by_AEtag in Shopify Flow to track which orders went through the Account Editor review window
Need Help?
If orders still do not sync correctly after following this guide, contact Account Editor Support and share:
- Your Shopify store URL
- Screenshot of Business Central → Shopify Shop Card → Synchronization tab
- Screenshot of Job Queue Entry 30104 settings
- Screenshot of Shopify Admin → Settings → Payments (capture method)
- The affected Shopify order number(s)